Wednesday, December 14, 2011

Greek Frittata

Finals are over! I have a life again!

This also means that I can cook during the day, and not when it is dark outside like usual. It's nice to be able to take pictures of food again, I've missed it so much! The only problem now is that the lighting in my apartment is really bad, so I have to go outside to take any photos....therefore we have snow in my photos.


The recipe I'm sharing with you today is from Weight Watchers and it is one of my new favorite breakfast dishes. So easy, so healthy and so tasty!

Greek Frittata
{4 Servings}
-4 Large Eggs
-3 Large Egg White
-1 Tbsp Water
-1/4 tsp Salt
-1/4 tsp Pepper
-2 tsp Olive Oil
-1/2 cup diced Red Onion
-1 clove minced Garlic
-5 oz of Baby Spinach
-1/2 cup crumbled Reduced Fat Feta Cheese
-2 tsp dried Parsley

In a medium bowl, whisk together the eggs, egg whites, water, salt and pepper. Set aside.

Heat 2 tsp of olive oil in a non-stick pan over medium heat. Add the chopped red onion and cook/stir until softened. Add in the minced garlic and cook/stir for 1 minute until fragrant. Add in the baby spinach and cook/stir until the spinach wilts, about 2 minutes. Pour the egg mixture evenly into the skillet and stir gently to combine. Sprinkle the feta cheese and dried parsley evenly over the egg mixture. Reduce the eat to medium-low, cover with a lid and cook for 15 minutes until the center is set. Cut into 4 wedges and enjoy!


Only WW 4 points {160 calories} per wedge!

Enjoy!

Tuesday, November 22, 2011

His & Hers Deviled Eggs

Man, where has the time gone?!?!? I can't believe it's already Thanksgiving break and finals are only 3 weeks away.

Life has been pretty crazy for Dusty and I with school and work. If I didn't tell you before, Dusty is getting his Masters in Health Administration. He is also the graduate assistant for the dean of the program, graduate student representative for the graduate committee and the school senate, not to mention he is on the financial board for the student senate....he is a busy guy!

I've been equally as busy with nursing school, hospital clinicals, care plans and work. Pretty much, we cherish any days that we get off from our busy lives. I love the days where I don't have to go anywhere and I can live in my sweats, it a wonderful thing. But let me tell you what, with hospital clinicals and school, I definitely know that being a nurse is the right choice for me. I'm in love with it. Every patient is so unique and has a different story to tell, it's never boring! It's always changing and fast pace...it's awesome and perfect for me!

In other news, I reached my weight loss goal!
On 11/11/11, I reached my 25 pound weight loss goal, talk about a great day and wishes coming true! Now I've switched over from dieting to maintaining. It's been difficult mentally telling myself I'm allowed to eat more, but to not go crazy. Like the other night I discovered Ben & Jerry's "Sweddy Balls," and oh man, I'm in love! Not only do I love the name, the SNL skit, but this is gooood ice cream! It took everything in me to spread the pint of ice cream over 4 days. It's just something I'm going to have to keep working on. But going from a size 10 to a size 4 is definitely worth it and I don't want to go back ever again (unless I'm pregnant someday)! Weight watchers has definitely changed my life. If you have ever wanted to start dieting, this is the way to go :)

But enough about Dusty and I, time for the food....
Dusty's parents are coming down for Thanksgiving to spend it with us and we wanted to make deviled eggs. The problem is that Dusty and I grew up eating completely different deviled eggs. He likes his savory and I like mine slightly sweet. So we compromised and made both!
Mine are on the outer rim and Dusty's are in the center.

Dusty's Deviled Eggs
-6 Hard boiled Eggs, yolks removed
-1/4 cup Mayonnaise (light or regular)
-1 Tbsp Taco Seasoning
-Paprika
Crumble the egg yolks in a bowl. Mix in the mayo and taco seasoning until the egg mixture becomes creamy. Scoop the egg yolk mixture into a gallon sized plastic bag, cut the tip and pipe the yolk mixture into the egg white. Sprinkle with paprika.


Haley's Deviled Eggs
-6 Hard boiled eggs, yolks removed
-2 tbsp Mayonnaise (light or regular)
-2 tbsp Sweet Pickle Relish
-1-2 tsp dried minced Onion
-Paprika
Crumble the egg yolks in a bowl. Mix in the mayo, relish and dried minced onion until the egg mixture becomes creamy. Scoop the egg yolk mixture into a gallon sized plastic bag, cut the tip and pipe the yolk mixture into the egg white. Sprinkle with paprika.

There you have it!
Two different types of Deviled Eggs. Hopefully, no one in his family likes mine...that way I get to eat them all!
Muahahaha! (evil laugh)
I hope you all have a great Thanksgiving break, and a Happy Thanksgiving!

Sunday, November 6, 2011

Bloody Caesar

Back in August I posted this picture on my Facebook page and it created quite a buzz...
My favorite cocktail of all time....Bloody Caesar!

But according to feedback from posting the picture, only Dusty, his family, myself and people from Canada knew about this drink. So I'm here to share with you this delicious and refreshing drink.

If you love Bloody Mary's, then I dare you to try a Caesar. This drink has more tang, spice and kick to it. My favorite part about a really good Caesar is that when you have a sip of it, it causes a little tickle sensation with your soft palate from the spices. It's the only way to go! Once you try a Caesar, you'll never want to have a Bloody Mary again. If you hate tomato juice and don't like Bloody Mary's, then I apologize for this post.

Interesting little tidbit: According to Weight Watchers, a 5oz Caesar is only 4 points! Which makes it one of the lowest calorie mixed drinks along with Blood Mary's (same points), Jack & Coke, and a Whiskey & Coke. I don't even want to know the amount of points for a Bailey's & Cream! For just a casual night drink at home, I made my Caesar a "virgin" drink and it is only 1 point! Add in some celery sticks, peperoncinis and olives, and you've got yourself a salad! YUMMM.

I made myself one tonight to go with dinner and it was delicious and super easy. Perfect with seafood and any red meat, especially a juicy steak!

Bloody Caesar
{1 serving}
-4 ounces of Picante Clamato Juice (found in the juice section of your grocery store)
-1 ounce Water or Vodka
-1/8 tsp prepared Horseradish
-2-3 dashes of Worcestershire Sauce
-2-4 dashes of Tobasco
-Dash of Salt & Pepper
-Optional: splash of Jarred Jalapeno or Peperoncini Juice
-3 to 4 Ice Cubes

Combine all the ingredients into a cocktail shaker, shake to combine and pour into your glass. Or you could just combine all the ingredients into your drinking glass and stir to combine. Enjoy!

*30 calories per serving*
1 WW point with Water
4 WW points with Vodka

Sunday, October 23, 2011

Baked Mac & Cheese

I've done it again...
I've taken one of my favorite dishes of all time and made it healthier, but still absolutely delicious!

For this dish, I combined my Lobster Macaroni and Cheese with the Weight Watchers Mac and Cheese to create a scrumptious, lower calorie dish that makes eating better that much easier. The best part about this mac and cheese is that it tastes better the next day, but that always seems to be the case with mac and cheese!

Baked Mac & Cheese
{6 servings}

-8 ounces Penne Rigate
-1 Shallot, finely minced
-1 clove Garlic, finely minced
-2 tbsp Canola Oil
-2 tbsp All-Purpose Flour
-1/8 cup White Cooking Wine
-2 cups Skim (Fat-Free) Milk
-1/4 tsp Paprika
-1/8 tsp Cayenne Pepper
-1 Bay Leaf
-2-1/3 cup Shredded Reduced-Fat Sharp Cheddar Cheese
-1/2 tsp Salt
-1/4 tsp Pepper
-1 tbsp dried Parsley

First, preheat the oven to 350 degrees.
Prepare the penne pasta according to package instructions, drain and set aside.

In a dutch oven, heat oil over medium heat and add the minced shallots and garlic. Saute until softened. Add 2 tbsp flour and stir to toast the roux for 1-2 minutes. Add the 1/8 cup of white wine and let it reduce for 1-2 minutes. Pour in the 2 cups of skim milk and whisk the sauce continuously to remove the lumps. Add in the paprika, cayenne pepper and bay leaf.

Bring the sauce to a simmer and then reduce the heat to low. Allow the sauce to thicken for 5-10 minutes until the sauce coats the spoon. Remove the bay leaf.

Stir in 2 cups of the cheddar cheese slowly by the handfuls while continuously stirring and add in the salt and pepper. Add in the cooked penne pasta and stir well to combine. Correct seasoning with salt and pepper.

Pour the macaroni and cheese into a greased 8x8 baking dish and top with the remaining 1/3 cup cheddar cheese and parsley. Bake for 25 minutes until hot and bubbly. Then remove the baking dish from the oven and let the macaroni dish set for 10 minutes before serving.
Enjoy!

*365 calories and 12.8 g fat per serving*
8 WW points

Friday, October 21, 2011

Buffalo-Style Chicken Salad


Oh. My. Goodness.
This is good. This is really good.
Dusty and I had this salad for dinner last night and for lunch today.

Whenever we go out to eat, one of my favorite salads to order is a Fried Buffalo Chicken Salad. Healthy, right? Fried chicken that has been soaked in Frank's Hot Sauce with blue cheese dressing. So good, but oh so bad. To make this healthier I baked the buffalo chicken so I can still enjoy one of my favorite salads, without the heavy fried stuff and guilt.

Buffalo-Style Chicken Salad
{2 servings}

-1/3 cup crumbled Blue Cheese
-1/4 cup + 1 tbsp Light Mayonnaise
-1/4 cup Light Sour Cream
-1 tsp Distilled White Vinegar
-3/4 cup Panko Bread Crumbs
-1 Chicken Breast
-2 tbsp Frank's Hot Sauce
-4 cups sliced/torn Romaine Lettuce
-1 large Tomato, chopped
-1 Green Onion, thinly sliced
-Salt & Pepper, to taste

Preheat the oven to 450 degrees (F). Spray a small baking dish with cooking spray.

To make the blue cheese dressing, combine the blue cheese, 1/4 cup mayo, sour cream and vinegar in a bowl. Whisk together until blended.

Spread the panko bread crumbs out on some wax paper. Toss together the chicken tenders, hot sauce and 1 tbsp mayo in a bowl. Coat the chicken tenders, one tender at a time in the panko bread crumbs and place them in the baking dish. Bake for 5-7 minutes per side, until chicken is cooked through. Cut cooked chicken into bite sized pieces.

Toss together the lettuce, tomatoes and green onions in a bowl. Drizzle with the blue cheese dressing and serve the chicken on top. Enjoy!

Recipe Adapted & Inspired by Weight Watchers Complete Cookbook

Tuesday, October 18, 2011

Apple Sunrise Slaw

I use to swear that I would never ever eat anything that contained the words Light, Low-Fat, Reduced-Fat, etc. But then I gained weight eating, blogging and eating some more. So with doing Weight Watchers and watching every little calorie and gram of fat that has gone into my body, I caved in to the Lights and Low-Fat. I'm not going to lie, I don't notice the difference.

If I'm making a sandwich and want to spread on some mayo, I use the real stuff, but if I'm using larger quantities, I use the light stuff. Did you know that 1 tbsp of real mayonnaise is 3 points??? I have only 23 points to work with each day, I'm not going to waste it on mayo!

I found this recipe for Apple and Carrot Salad on Weight Watchers Kitchen Companion. I made it according to directions and took a bite.....bland! No taste! Uh oh! Then I suddenly remembered that Laurie from Simply Scratch made a similar Apple & Cabbage Slaw with a creamy dressing that looked delicious. I combined the two recipes and created Apple Sunrise Slaw!

Why the "sunrise"? 
Because I couldn't find pre-cut matchstick carrots at the grocery store and could only find a bag of "Sunrise Slaw" veggies which is a combination of carrots, red cabbage and broccoli. I'm sure I could have just bought carrots and cut them myself, but I'm a full time nursing student on a diet, I gotta have some convenience! Besides, I ended up loving the blend of colors in this dish from the sunrise mixture, but you could use pre-cut carrots too.

 Here is what you are going to need {4 servings}:
-1 Apple, cored, thinly sliced, cut into matchsticks
-2 tsp Lemon Juice
-1-1/2 cup Sunrise Slaw veggies (or matchstick carrots)
-1/8 cup chopped Chives
-2 oz. reduced fat Feta Cheese
-1/4 cup Light Mayonnaise
-1 tbsp Honey
-1 tbsp Apple Cider Vinegar
-1/2 tsp Salt
-1/4 tsp Pepper

Place the sliced apples in a large bowl and toss with lemon juice. Add sunrise slaw, chives and feta cheese. In a small bowl, combine the mayonnaise, honey, cider vinegar, salt and pepper. Whisk until combined. Pour dressing over slaw mixture and toss to coat. Cover with plastic wrap and refrigerate 30 minutes to an hour before serving.

1 serving = 3/4 cup
106 calories and 4.8 grams fat
Only 2 points!

Recipe Inspired by Weight Watchers and Simply Scratch

Sunday, October 16, 2011

Better-For-You Tailgaiting Tips

With football season in full swing, I'm sure we have all had our share of delicious game-time food. To me, it's not a game without some good grub. Although this year I've been on the search for healthier alternatives to my game-time dishes.

I was so excited when I was contacted by Crystal Light Pure, who gave me some "Better-For-You Tailgaiting Tips" and I want to share these awesome tips with you today too!

Better-For-You Tailgating Tips from Crystal Light Pure Spokesperson Molly Kimball, RD
1. Take dipping beyond chips and queso by making your favorite creamy dips low cal with plain lowfat Greek yogurt in place of sour cream and mayo. Liven up plain old salsa by adding freshly diced tomatoes and chopped cilantro, or – even better – make your favorite salsa from scratch.

2. Serve dips with whole grain crackers and grilled veggies (think marinated and grilled asparagus, red and yellow peppers, zucchini and squash, and Portobello mushrooms). I’ve found that a grilled veggie platter nearly always goes over better than just plain raw vegetables.

3. Make finger sandwiches better by using whole grain bread, lean meats like turkey, ham, chicken, or roast beef, with thinly-sliced cheese and light mayo. Or roll turkey and veggies into high fiber tortillas, and slice into pinwheels. Quesadillas can be another not-so-guilty indulgence – just stick with whole grain tortillas, lean meats, reduced-fat shredded cheese, and pile on the veggies.

4. Healthy grilling doesn’t mean you’re stuck with just plain chicken. Seasoned, grilled and sliced, pork loin can easily become finger food. No buns or rolls needed. Beef or chicken satay can be lean options. And kebobs are always a hit, made with lean meat or seafood and skewered with veggies like tomatoes, zucchini, onions and mushrooms.

5. And stay refreshed and well-hydrated by sipping on naturally sweetened Crystal Light Pure. It’s sweetened with sugar and Truvia, a natural sweetener derived from the stevia plant, and has no artificial flavors or preservatives. Just tuck a few packets into your purse or pocket and you’re good to go!

Kraft Foods sent me a sample of Crystal Light Pureand I gotta tell you, I love it! I've never tried it before, and Dusty and I both love the Strawberry Kiwi and Grape flavors. They are so tasty! Plus they are perfect for my Weight Watchers diet....0 points for one 8 ounce serving!
Heck yes! Score!

I hope that these 5 tips from Crystal Light Pure help you out with tailgaiting this football season like it has helped me. Tonight I'm making some healthy Football Spicy Wings, and it is gonna be soooo good!
Happy Football Sunday!

*Information, tips, photo and sample of Crystal Light Pure provided by Kraft Foods.

Monday, October 10, 2011

Turkey Meatloaf with Cranberry Glaze & Giveaway Winner

First off, I want to thank you for sharing all of your wonderful holiday memories for the giveaway. There were a lot of really fun ones that I enjoyed reading. Most of you do a lot of baking! What is the holiday season without food and baked goodies?!?!?

Secondly, I'd like to announce the winner of Quick & Easy Christmas, by The Gooseberry Patch. The winner of this lovely cookbook is....
Cheryl Ogenbaug!!!

Congrats Cheryl! I love your holiday traditions, especially opening stockings...they usually have the best stuff! I might have to look into those croissants from William Sonoma for this year at Christmas, I bet they are good!

To claim your fun new holiday book, just email me your address at girlygirlcooks@aol.com and I'll get that out to you ASAP!

Lastly, I gotta share with you a recipe from this book. I loved it so much, I'm going to share this recipe when I teach a holiday cooking class this November at work. It's Penny Sherman's recipe for Turkey Meatloaf with Cranberry Glaze. It was like a little Thanksgiving dinner packed into one meatloaf.

DELICIOUS!

I didn't get to take any picture of it because I got home from work late and Dusty had already dug into it. Besides, we all know what meatloaf looks like, right? It looks like meatloaf, but the touch of cranberry sauce with the poultry seasoning added to it, makes it a great holiday season meal. You will love it!

Turkey Meatloaf with Cranberry Glaze
{6 servings}

-16 oz can Jellied Cranberry Sauce, divided
-1/2 cup Ketcup
-1-1/4 lb Lean Ground Turkey
-1/2 lb Ground Pork
-1 egg, beaten
-1 cup soft Bread Crumbs
-1 Onion, finely chopped
-3/4 tsp Poultry Seasoning
-1/2 tsp Salt
-1/8 tsp Pepper

Mix together 1/3 cup cranberry sauce and ketchup. In a bowl, combine turkey and remaining ingredients. Add 1/3 of cranberry sauce mixture. Mix until well blended. Spoon into an 8"x4" greased loaf pan. Bake, uncovered, at 350 degrees for one hour. Top with remaining cranberry sauce mixture and bake an additional 10 minutes. Let stand for 10 minutes beore slicing. Serve with remaining cranberry sauce.

Sunday, October 2, 2011

Quick & Easy Christmas: Gooseberry Patch Review & Giveaway!

I know we have just entered the month of October and Halloween decorations are among us, but why not start prepping for Christmas???

If you're like my mom and myself, you start Christmas shopping in July and the Christmas decorations are up by Thanksgiving day. I don't know which holiday season I love more....Halloween or Christmas? The span from October to December is just so wonderful and magical. I can't choose! I love it all!

Today, I have the wonderful honor and privilege of introducing you to the newest and one of the most fantastic cookbooks from The Gooseberry Patch....Quick & Easy Christmas!
Over 220 Christmastime recipes...most 30 minutes or less! Plus simple decorating ideas & gifts. 

I was so thrilled when I received my copy of this cookbook in the mail on Friday, I couldn't put it down and tagged so many wonderful recipes to try out. Today I'm going to share with you two of them, Gooey Honey Biscuits and Jenn's Pistachio-Cranberry Cookies.

Gooey Honey Biscuits
By Cheri Emery
This recipe was the perfect breakfast this morning. It was so quick to put together and I had the biscuits ready to go in the oven before the oven was done preheating! The biscuits were soft, flaky and fluffy, not to mention delicious!
They look rustic and went great with a tall glass of milk. The only thing I would do differently is to maybe double the honey butter because the warm biscuits absorbed the initial honey butter I brushed over top, so I had to brush more on later (oh darn!). It only made them taste better ;)

Jenn's Pistachio-Cranberry Cookies
By Debbie Button
These cookies are pretty much going to be my new favorite holiday treat that I'm going to make every single year from now on. How cute is it that it is red, green and white? Green pistachios, red cranberries and white chocolate chips. Not only do they color coordinate, they taste fantastic together! I don't know about you, but my favorite way to have cookies recently is by using cake mix, they create the most soft and fluffy cookie, and these cookies don't disappoint! 

Just to show you how fun their decoration and gift ideas are, here are an example of a few...
*Dress up the beverage station at your holiday buffet. Fasten a festive ribbon around a punch bowl and set it in a fresh pine wreath...so pretty!

*Dress of plain pillar candles in an instant...press in fancy brass upholstery tacks or map pins to form spirals, starts, stripes or other simple patterns.

*Give your home a spicy holiday scent year 'round. Cover oranges with whole cloves, piercing the peels in circle and swirl designs or simply covering the fruit at random. Roll in cinnamon and ginger, then stack in a wooden bowl.

Now for the best part....the GIVEAWAY!
Gooseberry Patch was kind enough to send me another copy of this fantastic holiday book to share with you! All you have to do is....

Leave a comment on this post answering the following question:
What's your favorite holiday tradition?

Do you go shopping on Black Friday? Have a special treat you must make? Do you open Christmas present on Christmas eve or day? Tell me your favorite holiday traditions!

Winner will be chosen randomly and announced October 9th, 2011, so enter before it's too late!

Monday, September 26, 2011

Apple Pork Loin {Revisited}

As of today, it is officially the Fall season for me. I've got my favorite Fall dish of all time in the oven and my stomach can hardly stand the wait. The only difference this time, is that I've made tons of calorie cuts to make this dish diet friendly!


Here is the original list of ingredients....
-1-1/4 cup Apple Cider
-2-1/2 lb Boneless Pork Sirloin
-2 tsp Salt
-1 tsp Pepper
-3 tbsp Olive Oil
-2 small Onions-cut into 1/2 inch wide wedges
-2 Pink Lady or Honeycrisp Apples-peeled,cored and cut into 1/2 inch cubes
-2 cloves Garlic-sliced
-1/4 cup Chicken Broth
-2 tsp dried Thyme (or 4 fresh Thyme sprigs)
-2 tbsp Cider Vinegar
-4 tbsp cold Butter

Per serving (4 servings total) this is a whopping 645 calories and 34 grams of fat!
This dish isn't even on my point scale for Weight Watchers!
Yikes!

So here is the new and improved Apple Pork Loin {diet friendly}:
-1-1/4 cup Apple Juice
-1-1/2 lb Boneless Pork Loin Sirloin
-2 tsp Salt
-1 tsp Pepper
-Pam Canola Oil Cooking Spray
-2 small Onions-cut into 1/2 inch wide wedges
-2 Pink Lady or Honeycrisp Apples-peeled,cored and cut into 1/2 inch cubes
-2 cloves Garlic-sliced
-1/4 cup Fat-Free Low-Sodium Chicken Broth
-2 tsp dried Thyme (or 4 fresh Thyme sprigs)
-2 tbsp Cider Vinegar
-2 tbsp cold Butter

Let's go through the ingredients and talk about the changes I made, shall we?
1. Apple Cider to Apple Juice
-There was no real reason for this change. I couldn't find Apple Cider unless I wanted to buy a gallon of it, so I opted for a single serving Apple Juice bottle instead. I just wanted to save money and I've never seen a big difference in taste between the two with cooking.

2.  2-1/2 lb Pork Loin to 1-1/2 lb Pork Loin
Dusty and I do not need to be eating that much meat! There is only two of us and with Weight Watchers, I have learned about portion control and the proper size of meat per serving.

3. Where did the Olive Oil go?
I took out the olive oil because that was a lot of unwanted fat and calories. I achieved the same sear on the pork loin and was able to carmelize the onions, apple and garlic without 3 tbsp of olive oil and just a couple sprays of Pam Canola Oil instead. I promise, you won't notice the difference!

4. Regular Chicken Broth to Fat-Free Low-Sodium Chicken Broth
Who needs the extra fat and sodium? The dish is delicious without it and it's better for you too!

5. 4 tbsp Butter to 2 tbsp Butter
The purpose of the butter in this recipe to create creamy wonderfulness at the end. I'm sure I won't miss those 2 extra tablespoons as long as some butter is there! It's still going to be creamy and it's still going to be wonderful, just without the unnecessary grams of fat and calories.

So what is the grand total of calories now for this delicious dish?
Drumroll please....

345 calories and 13 grams of fat!
7 points per serving for all of you WW people out there!

YAY! Success!

I'm also enjoying a 9 oz baked potato with dinner that is only 4 points and I'm going to take some of the reserve apple/onion chutney from the dish to smother on my potato it instead of using butter and sour cream.

Friday, September 23, 2011

Time Flies....

Has it really been 12 days since my last blog post? Wow. I'm a terrible blogger right now. The sad thing is, 12 days ago was the last time I had a day off. On days that I'm not at work, I'm at school. It's been insane, exhausting and I am so thankful to have this Sunday off!

Here is what has been going on in the past 12 days since I last wrote...

1) I'm lovin' nursing school. Labs have been so much fun with eye/ear assessments, learning how to make a proper hospital bed and take vital signs. Dusty is my practice dummy and gets his vitals taken everyday. I'm happy to tell you he has awesome blood pressure, respiration and pulse!

2) At work we are remodeling the entire store, which means I'm getting a great workout at work with all the lifting, pushing and moving I've been doing to get the store lookin' pretty.

3) This week my favorite TV shows (Modern Family and Grey's Anatomy) have returned. My life is complete.

4) Today I'm so excited to have the opportunity to work with the nurses at St. Vincent's Hospital to do blood pressure readings at the Yellowstone Valley Women's Health Fair! It's going to be great practice and an awesome experience.

5) Monday and Tuesday we are going over wound care in class. I'm not looking forward to this. Pressure ulcers make me squirm and gaggy. I won't be eating before those classes.

6) Dusty and I went to the traveling WWI exhibit this morning in Billings. It was really fun and I loved looking at all the uniforms and artifacts. If it comes to your city/town, you should definitely take the time to stop by and check it out. We really enjoyed it!

7) On Tuesday, Dusty and I went on a "date night" to Olive Garden and to see The Lion King in 3D. It was my first time eating at Olive Garden and I gotta say I was really disappointed. Why did it have all that hype? Dusty warned me that Olive Garden wasn't good, but I had to experience it. It was on my "to-do" list of places to eat. Now I've come to the conclusion that I hate chain restaurants. On the otherhand, I LOVED watching The Lion King. I forgot how much I love that movie! It's funny how much you pick up in the movie when you are an adult compared to when you are little. Just the little things that went over your head, now finally make sense. It was a good time.

8) My cooking has taken a slight turn for the worse. I've been making "diet friendly" dishes and Dusty is not happy about it and I gotta admit, I'm not happy either. I miss butter. I miss heavy cream. I miss baking. If you have diet friendly recipes that are absolutely delicious, PLEASE SEND THEM TO ME! I tried making cupcakes without the use of oil and eggs, and it was terrible. I wanted to cry and I threw them out. I've lost 16 pounds, but I want to make good food too! With my blog in the past year I've taught myself how to make delicious rich foods, but now I need to learn how to make delicious light foods. It's an adjustment and I'm working on it.

So this is what has been going on with my life in the past 12 days. Not very exciting, right? This is why I haven't posted since then. But I'm going to be on the search for light and delicious dishes to share with you all because butter and heavy cream aren't good for the waistline (especially if you need to fit into a wedding dress!).

Have a great weekend!

Sunday, September 11, 2011

Football Spicy Wings

It's that time of the year. Back to school, the fall season, cooler weather to finally turn our ovens back on  and....Football! Tonight is the first Cowboy's game of the season, which means it's time to celebrate for Dusty. He has been a die-hard Cowboy's fan since before he can remember, so I'm making him the ultimate "man food" of chicken wings in honor of the game.


Is it delicious?
Yes!

Is it spicy?
Yes!

Will your fingers get dirty and will you be licking them?
Yes!

Will your lips be tingling?
Yes!

Are they high calorie?
NO!!!!!!

That is the best part of this recipe! I made chicken wings last year for a big Cowboy's game when Dusty had all the guys over and boy were they high caloric. Not that they weren't delicious, but with being on Weight Watchers and all, I wanted to enjoy some this year too and not get left out! So I did some researchin' and found this amazing recipe for chicken wings from Gina's Skinny Recipes. This website has saved me while I've been dieting. It's fantastic, the recipes are delicious, and you gotta check it out!

So can you guess how many calories these bad boys have???
Take a guess....
Give up?

250 calories and only 6 points for 2 wings!
My wings were a little bit larger than the original recipe on Gina's Skinny Recipes. Mine were about 4 ounces per wing, so that is 8 ounces per serving (1/2 lb). But even so, 6 points/250 calories is awesome and I didn't feel left out at all! Plus Dusty said that they tasted just as good, if not better, than the wings I made last year with all that butter and frying oil I'd used before. SCORE!


Here is what you are going to need for 3 servings:
-1-1/2 lbs Chicken Wings (6 wings)
-1/4 cup +1 tbsp Frank's Hot Sauce
-2 tbsp White Vinegar
-1 tsp dried Oregano
-2 tsp Paprika
-1-1/2 tsp Garlic Powder
-1-1/2 tsp Chili Powder
-Salt and Pepper
-Ranch or Blue Cheese Dressing (extra calories and points)

In a large plastic bag, combine 1 tbsp Frank's Hot Sauce, white vinegar, dried oregano, paprika, garlic powder, chili powder, salt and pepper. Cut the extra little funky tips off the chicken wings because they are useless and don't have any meat. Toss the trimmed wings into the bag with the marinade, shake it up well and let it sit out at room temperature for 30 minutes.

Preheat the broiler on Low for 5 minutes. Place the wings on an aluminum covered and greased (cooking spray) baking sheet. Place them in the oven, about 8 inches away from the broiler (about the middle rack) and bake for 8-10 minutes on each side. Meanwhile, in a small saucepan, warm up the remaining 1/4 cup of Frank's Hot Sauce.

Once the chicken has been cooked all the way through, remove them from the oven and toss them, one at a time, in the saucepan of warmed hot sauce. Arrange the wings on a platter or 2 wings on your plate with some veggies and ranch/blue cheese dressing for the ultimate "man food" for the big game!

Enjoy!

Pictured Above: Wings with Veggies and 2 tbsp of Light Ranch Dressing = 8 points!
Recipe Source: Gina's Skinny Recipes

Wednesday, September 7, 2011

BBQ Macaroni Salad

You are going to love this macaroni salad! Only 5 ingredients and you have a super easy and incredibly tasty side dish. This has become my go-to mac salad because I almost always have the ingredients on hand and it only takes about 10-12 minutes to make.

So here is what you are going to need {4 servings}:
-1 cup of dry Elbow Macaroni
-Salt and Pepper
-1/3 cup Mayonnaise
-1 tsp Chili Powder
-2 tbsp BBQ Sauce
-2 Greeen Onions-sliced thin

Pretty simple, right???

Bring 2 quarts of water to boil in a pot. Add macaroni and 1/2 tbsp salt to boiling water and cook until tender. Drain macaroni and rinse with cold water until cool. Drain briefly, so that the macaroni is still moist, then transfer to a large bowl.

Add mayonnaise, BBQ sauce, green onions and chili powder to the bowl....

...And toss to combine.
Season with salt and pepper to your liking.
You can either eat it now because the temptation will be too great, or you can cover the bowl with plastic wrap and chill it for about 30 minutes to an hour. Either way, it's all good!

Now I know I told you I was doing Weight Watchers, and I'm sure you guys are all thinking, "Really Haley? Pasta salad with Mayo?"
But let me tell you what....each serving of pasta salad is 4 points, approximately 200 calories! Each servings is a heaping 1/4 cup scoop of pasta salad and it is more than enough!

I had this for dinner last night and it was a grand total of 8 points!

Macaroni Salad = 4 points
Grilled Chicken Breast (3 oz) = 3 points
Whole Wheat Sandwich Thin = 1 point
Veggies (no spread) for Chicken Sandwich = 0 points
Chopped Tomato with Salt, Pepper and Dried Basil = 0 points

This just shows you can enjoy an absolutely delicious dinner for low calories (or points)!

Recipe Source: America's Test Kitchen 30 Minutes Meals


Monday, September 5, 2011

Getting Married!!!!

I'm so excited to announce that Dusty and I are going to be getting married July 13th, 2013!

That would be 677 days from now....just in case you were curious. Not that I'm counting or anything.

Last Friday I was so excited that Dusty was coming home from harvest, I just wanted to see him after him being gone for a month. It was probably one of the longest months of my life because I missed him so much. So you wouldn't believe how happy and excited I was that the day he came home from harvest that he popped the question!
It was the best day of my life.

The Proposal:
Dusty had only been home for an hour when he suggested for fun that we should go look at engagement rings at the mall, just for the heck of it. Also, because he knows how much I love going to the jewelry stores to look at the rings (because I like to drop unsubtle hints about wanting to marry him!). It would just be something fun to do on a hot day. I didn't really feel like getting out of my comfy clothes, so I suggested we could look online at some of the rings before going to actually look. As we were looking through the rings online, Dusty got up and walked behind me and the couch, not thinking anything of it I kept looking at the rings. From behind, Dusty said, "Oh, I really like that ring."
"Which one?" I asked, not aware of anything going on behind me.
"That one!"
"Ok, seriously. Which one are you pointing at?"
"This one..."

As I turn around, I look back to see Dusty holding a box with the most gorgeous ring I have ever seen in my entire life! At first I'm not believing my eyes, I thought I was seeing and imagining things, until he asked me...
"Will you marry me?"

I tossed the computer to the side, covered my mouth with my hand in complete shock, stood up to hug him and started crying hysterically saying, "Really? Oh my gosh! Really? YES!!! OF COURSE!!!"

It was the most wonderful moment of my life.

Dusty's hands were trembling as he took the ring out of the box and as he placed it on my finger. We were both smiling, laughing, hugging and crying tears of joy all at the same time. I'll never forget it. It was absolutely the most perfect proposal.

And can you believe how gorgeous this ring is???
He did good!

As it turns out, earlier in the month, Dusty, his mom and sister went to pick it out. He said that the moment he saw it, he knew it was the ring for me. I love that fact that his family was involved in helping him pick it out, it really means a lot to me, plus I love how the ring looks like an heirloom, even though it's not.
It's just absolutely stunning. Hopefully I don't get in a car accident, because I find myself staring at it while I'm driving! 

I also love that Dusty called my parents 5 days before he came home to ask for my parents blessing. I'm impressed that they were able to keep it a secret! I had absolutely no idea and was completely surprised!
Good job guys! Great work!

The Wedding:
Dusty and I have decided to wait until July 13th, 2013 to get married instead of next summer because we are both starting out our school programs this year, nursing for me and Dusty's health administration masters program. It would just be too stressful and I want to enjoy every moment of planning the wedding with Dusty, his family and my family. We don't want the wedding to feel rushed and stress everyone out. It's going to be a great time!

But don't you worry, we have already gotten quite a bit done already!
The next day after Dusty proposed, we went and loaded up on wedding books, magazines and planners. Dusty has already read his "groom book" and says he is good to go. I still have a lot of reading to do. I didn't realize how much goes into a wedding until I read the checklist!

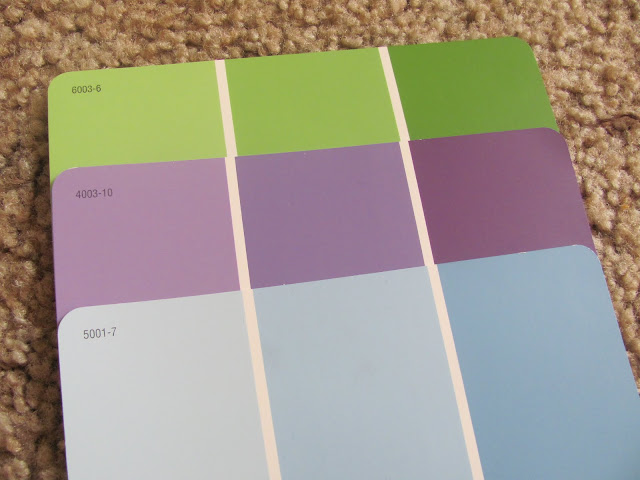
 So, within the last week, we have picked out our colors....
Green, Purple and Blue (in various shades)

Plus we have already secured our venue (reception and ceremony) at The Daly Mansion thanks to the awesome help from my parents! We are so excited because Dusty and I have talked about wanting to get married there for about 2 years now, and it's finally a reality!

The grounds are stunning!

It's going to be so beautiful and so much fun!

Oh yeah, and of course my sister Annie is going to be the Maid of Honor, I like to call her my "MOH" for short.

Other than that, we have been cutting and pasting things that we love out of magazines and bookmarking things we see online. We are trying to collect as many ideas as possible for the big day!

Friday, August 26, 2011

Halibut en Papillote

Happy Friday!!!

This Friday couldn't have come soon enough because Dusty comes home from harvest today! He's been gone since the beginning of the August and I've been missing him like crazy. I should be used to it by now because he's gone home for harvest every year since we've been dating, but it's still hard being away from him.

But now he is coming home!!!!
(Can you tell I'm excited?)

I'm also excited to tell you that since I've moved to Billings, as of today I've lost 12 pounds!
College was rough on my body. I had a HUGE scholarship that created a lot of extra stress on me and I didn't know how to really deal with it. Instead of taking my stress out at the gym or going for a walk, I used food to comfort my stress and horrible anxiety. Each time I would start a diet I would work out like crazy and have no results. One time, I spent every morning for 3 months working out at the gym and lost only 3 pounds max. It just shows that I wasn't eating right during that time because you would have thought I would have had more results, but I didn't and I was very discouraged.

So why am I having so much success now? Two words....Weight Watchers.

I've been using the old program and it has been working fantastically! Plus after 5 years of college, I've finally learned how to deal with the stress of college and life. I don't let it get to me like I use to because I know everything will work out in the end.

With the Weight Watchers program, I love that I get to eat what I want, but in smaller portions. I feel content at the end of the day because I'm not cutting foods that I love out of my life, which is great!  I could never do a diet that didn't allow me to have any carbs, dairy or fats. It would lead to lots of frustration and instant failure. This program has been teaching me portion control and how to be smart with my meal planning to get the most out of it by making wiser decisions.

The only thing that is complicated with the program for me is that most recipes don't have calories listed on them, so I have to do the research myself. Thanks to a calorie counting App on my iPad or just by googling the calories, I add up all the calories myself for the recipe and then divide it into what each serving would be. It takes some time, but at least I get to eat all the recipes I'm dying to try! So with the combination of eating right and working out at least 30 minutes a day on my exercise bike, I'm having amazing success and feeling so great! I'm lovin' it!

As an example of eating what you want, here is a recipe from Halibut en Papillote from America's Test Kitchen that I calculated to be about 340 calories (7 points) and it was delicious! The original recipe calls for Halibut fillets, but all I could find was a Halibut Steak. So the 7 points is calculated for the steak, but I bet the fillet is definitely less calories.

Here is what you are going to need {2 servings}
-1 Zucchini, sliced 1/4" thick
-Salt & Pepper
-2 Plum Tomatoes, cored, seeded and chopped
-1 tbsp Extra Virgin Olive Oil
-1 clove of minced Garlic
-1/8 tsp dried Oregano
-Pinch of Red Pepper Flakes
-2 (6 ounce) Halibut Steaks- 1 to 1-1/2" thick
-2 tbsp Dry White Wine
-2 tbsp chopped fresh Basil
-Lemon wedges, for serving

In a colander, toss the sliced zucchini with 1/4 tsp salt, and let drain for 30 minutes. Spread the zucchini on a double layer paper towel and pat dry and wipe of any residual salt. Adjust the oven rack to the lower-middle position and heat the oven to 450 degrees (F).

In a medium bowl, combine the tomatoes, oil, garlic, oregano, red pepper flackes, 1/4 tsp salt and pinch of pepper. Pat the halibut dry with a paper towel and season with salt and pepper on both sides.

Cut four 12-inch sheets of aluminum foil and arrange the zucchini in the center of the foil in a shingle formation of two foil sheets. Drizzle 1 tbsp of white wine over each mound of zucchini, then lay the haibut steak on top. Spoon tomato mixture on top of the halibut. Place second square of foil on top of each stack and fold edges over several times to seal and make an airtight pouch.

Lay the packets on a rimmed baking sheet and bake for 12 minutes. Carefully open packets away from you, so the steam escapes away from you, and then use a spatula to gently lift the halibut and vegetables onto your plate. Sprinkle with basil and serve with lemon wedges.

(I was hungry, so I also had some peas to go along with my tasty dish)

Enjoy!

Wednesday, August 24, 2011

Some Things I Want To Bake...

I love spending my free time reading through my favorite blogs and bookmarking all the delicious recipe that I'm wanting to try. Here are a few of the mouth-watering baked goods that I'm dying to make!

Photo from Gina's Skinny Recipes

Photo from Eat Yourself Skinny

Photo from WBACC

Photo from Life as a Lofthouse

Photo from Food Network

Photo from Two Peas & Their Pod

Photo from Cook Bake & Decorate

Don't these recipes look scrumptious? Who needs a cookbook when there are so many talented bloggers and ideas online?!?!?  I can't wait to try these recipe out over time and enjoy every bite!

Sunday, August 21, 2011

Cheese-Making Kit Giveaway!

Today I spent the day cleaning my entire apartment. I mean serious cleaning. Like top to bottom cleaning. It was intense. Every inch of the apartment sparkles now and smells super fresh in prep for school starting next Monday.

While I was cleaning out my kitchen I found this fantastic cheese making kit!

I got it when I took a cheese making class and haven't even opened it. I've been so busy with moving, getting settled, working, summer classes and prepping for nursing school next week, I haven't even had a chance to touch it! I received my schedule for classes, labs and clinicals for this Fall and I probably won't be able to use this awesome kit or give it the love it needs. This means I'd like to pass this totally awesome and fantastically fun kit on to you!

The kit includes....
-Recipes for Ricotta, Cottage and Mozzarella Cheese + more!
-Supplies for 30 batches:
  • 8 oz Citric Acid
  • 8 oz Cheese Salt
  • 1 yard of Cheesecloth
  • Dairy Thermometer
  • 10 Rennet Tablets
-Super Easy Intructions!

TO ENTER:
Leave a comment on this blog post answering the following question...
What is you favorite type of cheese?

Is it fresh mozzarella, blue cheese, feta cheese, gruyere? What's your favorite!?!? If you love cheese as much as I do, then you are going to love this kit! It only takes 30 minutes and then you have fresh cheese of your own. It's super easy and the instructions are great too!
How cool is that?

For extra entries, follow The Girly Girl Cooks on Facebook and/or Twitter and leave a comment on this blog post telling me you follow me! Winner will be selected randomly and revealed Thursday, September 1st!

Not a paid advertisement by Ricki's Cheese Making. They don't know who I am and I just want to share the lovin'!

Saturday, August 20, 2011

The Cutest Little Bundt Cakes

I just think that this Blueberry Bundt Cake is the cutest dessert ever!

I love single-serving desserts like cupcakes because you don't have to share. It's yours and yours alone! Plus it allows you to not overindulge, which I tend to do with slices of cake and pie. If I've gotta whole delicious pie in front of me, I'm gonna want to eat it all! It's kind of a problem. But this dessert is perfect. It's cute, summery fresh and delicious!

For a perfect individual bundt cake, you are going to need these adorable 1-cup bundt pans from World Market. I'm sure they are found at other cooking supply stores, but these were only $1.49 a piece! I love a good deal.
Picture from World Market
Don't have a World Market near you? You can order these cute pans on their website....HERE!

Anyways, I found this fantastic recipe from America's Test Kitchen "Cooking for Two" magazine. Over the summer I have fallen in love with ATK and all of their delicious recipes. I like that they give in-depth explanations of certain steps and processes, and why the recipe works.

Here is what you are going to need for 2 Individual Bundt Cakes:
-1/2 cup All Purpose Flour
-1/2 tsp Baking Powder
-1/8 tsp Salt
-3 tbsp softened Butter + more for greasing pans
-1/4 cup Sugar
-1 large Egg, room temperature
-1/4 tsp Vanilla Extract
-2 tbsp Milk, room temperature
-1/2 cup ripe Blueberries

Adjust the oven rack to middle position and preheat the oven to 350 degrees (F). Grease two 1-cup bundt pans with butter.

In a small bowl, whisk the flour, baking powder and salt together. In a medium sized bowl, beat butter and sugar together with a hand mixer or by hand on medium speed until light and fluffy, 3 minutes.
*A KitchenAid mixer is not going to work on this recipe since the amount of ingredients is so small, so use a hand mixer instead (ATK tips!).

Beat in the egg until combined, about 30 seconds. Beat in vanilla until incorporated. Reduce mixer speed to low and beat in 1/3 of the flour mixture, followed by 1 tbsp of milk.  Repeat with half of remaining flour mixutre until just incorporated. Then add in the blueberries and gently fold them in.
*Your batter will be thick, so don't panic!*

Divide the batter evenly between prepared 1-cup bundt pans, smooth tops and gently tap each pan on counter to settle batter. Place pans on baking sheet and bake the cakes for 20 to 30 minutes, rotating halfway through, until toothpick comes out clean.

Once the cakes are done baking, allow the cakes to cool for 10 minutes in their pan. Then flip them out onto wire rack and let them cool completely for 30 minutes. Make a glaze or dust with powdered sugar and you are ready to enjoy your tasty (and cute) dessert!


PRINT RECIPE HERE!
*Not a paid advertisement for World Market, I just like their stuff!*

Wednesday, August 17, 2011

Birds Eye Chef's Favorite {Review}

Last week I received a really fun surprise in the mail....a box full of Birds Eye Chef's Favorite side dishes through the Foodbuzz Tastemaker program!

I was so excited to recieve my goodie box, you have no idea! And now I'm here to tell you about the super delicioius Roasted Red Potatoes & Green Beans that I enjoyed the other night.

Some nights I struggle with creating a good side dish to pair with my meal. I put all this effort into making an awesome main course, and then I forget about the side dish...oops! So the other night I made a pan-seared chicken breast and didn't know what side to have with it.
Salad? No.
Broccoli? No.
Ugh. 

Then I remembered I received my box of goodies and paired my chicken breast with the Roasted Red Potatoes & Green Beans. It was easy and delicious!

Just pop the bag into the microwave for about 6-7  minutes to steam cook in the microwave, and you have a side dish that is good to go!

I mean, look at this. Does this look like nasty frozen food?
No way! I looks like I slaved in the kitchen for at least an hour.
I was impressed.

The green beans were crisp. The potatoes were cooked perfectly and the light sauce add a very nice touch. Each bag has 2 servings, which is great for couples like Dusty and I! But since he is gone at harvest, I got to enjoy the 2nd serving for lunch the next day (and it reheats really well!).

If you are a busy parent, college student or just busy with life, I really recommend these great side dishes by Birds Eye for when you want something quick, easy and tasty. Did I mention it's pretty low calorie? Depending on the side dish, it ranges from 90-180 calories per serving...not bad at all!

The "Chef's Favorites" will be available in September, so keep an eye out for them!

P.S. The Primavera Vegetable Risotto was really good too! I had that one last night with dinner, and for lunch today with a salad. YUM!

*Thanks Foodbuzz and Birds Eye for the chance to sample and review this great product!*
Related Posts Plugin for WordPress, Blogger...