Sunday, August 15, 2010

Supremes de Volaille aux Champignons

Happy Birthday Julia Child!
For those of you who do not know, today would have been Julia Child's 98th birthday. Julia Child changed the world of cooking and introduced the world to the amazing tastes of french cuisine. In honor of her birthday, I decided to make "Supremes de Volaille aux Champignons" for dinner from her famous book Mastering the Art of French Cooking. Since I don't speak French and I doubt many people do, that recipe title translates into "Chicken Breasts with Mushrooms and Cream" and boy was it absolutely delicious! It also was surprisingly easy to cook as well!

Just for fun, here are 15 interesting facts about Julia Child:
1. Julia was born August 15th, 1912 in Pasadena, California.

2. Julia was 6 feet 2 inches tall.

3. During WWII, Julia joined the OSS (Office of Strategic Services) because she was too tall for the Women's Army Corp and the U.S. Navy.

4. Julia met her husband Paul while working for the OSS and they married September 1st, 1946.
5. Julia studied at the Le Cordon Bleu and later was privately studying with Max Bugnard and other master chefs in France.

6. Julia descirbed her first meal in France as "an opening up of the soul and spirit for me."

7. Julia joined a women's cooking club called Cercle des Gourmettes, where she met Simone Beck and Louisette Bertholle who all joined together to write Mastering the Art of French Cooking.
8. Simone and Louisette wanted Julia to help write the book so that it could appeal to Americans.

9. The three ladies opened a cooking school called L'Ecole des Trois Gourmandes (The School of the Three Food Lovers).

10. Mastering the Art of French Cooking was first published in 1961 by Alfred A. Knopf and was a staggering 734 pages long.
11. The French Chef television show staring Julia Child was first aired February 11, 1963 and was immediately a success winning Emmys and Peabody Awards.

12. In 2009, the movie "Julie and Julia" was made by Nora Efron reflecting Julia's life in France and the journey to creating her cookbook and a woman named Julie Powell who was going to cook every recipe from Julia's cookbook in a year.
13. In real life, Julia thought that Julie Powells attempt to cook every recipe in a year was a stunt, was not impressed and did not support Julie's blog due to her excessive use of the F-word and never describing the end results of the recipe or how it tasted or what she learned.

14. Julia's famous Cambrige, MA kitchen is currently featured in the Smithsonian National Museum of American History.
15. Julia Child died August 13th, 2004 at the age of 92 and her legacy will live on forever through her cookbook.

Now for Supremes de Volaille aux Champignons...
This is what you are going to need to make this delicious recipe (for 2 people):
-1 large Chicken Breast (cut in half) or 2 small Chicken Breasts
-1/4 tsp Lemon juice
-1/8 tsp Salt
-Pinch of Pepper
-2 tbsp of Butter

For the Sauce:
-2 tbsp Butter
-1/2 tbsp minced Shallots
-4 oz. of sliced Mushrooms
-Dash of Salt
-1/8 cup of Beef Stock
-1/8 cup of White Cooking Wine
-1/2 cup Whipping Cream
-Salt and Pepper
-Lemon juice-as needed
-1 tsp dried minced Parsley or 1 tbsp fresh minced Parsley

Since no one is better than Julia Child's teachings, I'm going to give the instructions as they were given to me in the book, Mastering the Art of French Cooking.

Preheat the oven to 400 degrees. Rub the supremes (chicken breasts) with drops of lemon juice and sprinkle lightly with salt and pepper.
Heat the 2 tbsp of butter in a casserole (dutch oven or large skillet) until it is foaming. Quickly roll the supremes in the butter, lay the butterend paper over them, cover the casserole and place in hot oven.


After 6 minutes, press top of supremes with your finger. If still soft, return to oven for amoment or two. When the meat is springy to the touch it is done (I was totally shocked, this really works!). Remove the supremes to a warm platter and cover while making the sauce (2 to 3 minutes).

For the Sauce:
Heat 2 tbsp butter in the casserole (skillet/dutch oven) over moderate heat until foaming. Stir in the minced shallots and saute a moment without browning. Then stir in the mushrooms and saute lightly for a minute or two without browning. Sprinkle with salt.
Pour the stock and wine into the casserole (skillet/dutch oven) with the mushrooms/shallots and boil down quickly over High Heat until liquid is syrupy.
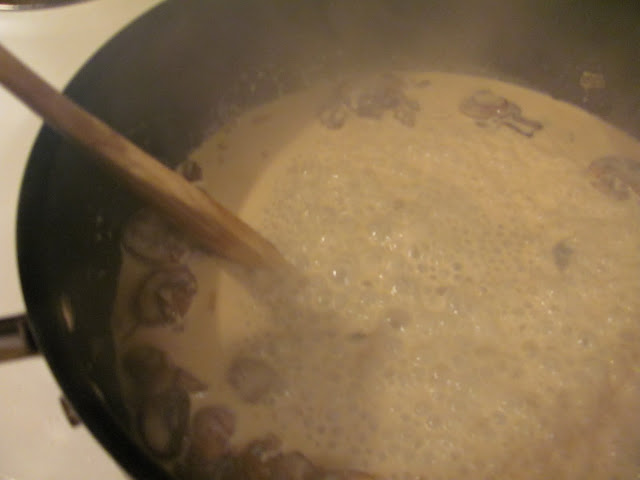
Stir in cream and boil down again over high heat until cream has thickened slightly.
Off heat, taste carefully for seasoning (salt/pepper), and add drops of lemon juice to taste. Pour the sauce over the supremes, sprinkle with Parsley and serve at once.
(Recipe from pages 267-269 of Mastering the Art of French Cooking by Julia Child)

I have to say, this dinner was soooo good! Dusty was really impressed and enjoyed it a ton. I have to admit that I might have licked the plate clean, the sauce is to die for! I served buttered peas with my chicken and in the book Julia also suggests serving buttered asparagus tips, artichoke hearts, creamed spinach or risotto cooked in chicken stock.
Now for the rest of the evening, I'm going to watch episodes of The French Chef and maybe even Julie and Julia to further celebrate Julia Child's birthday!
Bon Apetite!

Poached Eggs

This morning I finally conquered my last fear with eggs....I made and ate a Poached Egg! If you refer back to my earlier post "Fiesta Eggs and Potatoes", you will read all about my issues with eggs and as of this morning I don't have anymore issues dealing with eggs. I feel like a better person already! And actually, it was also a first for Dusty as well because he had never had a poached egg too! So we enjoyed our experience with our first poached eggs together...it was magical.

I actually got my inspiration from watching an episode of Julia Child's The French Chef, which was a half hour devoted to 101 ways to cook an egg. So, I sucked it up and tried it.
They are super easy to make and quite tasty.

If you have never made a Poached Egg and want to try, this is what your going to need (for 2 people):
-4 Eggs
-2 English Muffins
-Butter-softened
-Salt and Pepper

Get a small dish to hold the egg in and gently crack it into the dish. Make sure not to break the yolk.
Bring a small saucepan to a simmer over Medium-High Heat and gently place the egg into the water.
In the meantime, toast the English Muffins in a toaster and spread softened butter on them.
Allow 4-8 minutes to cook, depending on how hard you want the egg yolk to be.
Using a slotted spoon, scoop the poached egg out of the saucepan and place on your English Muffin.
Sprinkle Salt and Pepper to taste.
That's it!
Enjoy!

Friday, August 13, 2010

Individual Raspberry Cobblers

Don't you think Cupcakes are just the most adorable dessert in the world?
I DO!
Cupcakes are just the perfect size and are a small package of joy!
And so is this recipe....
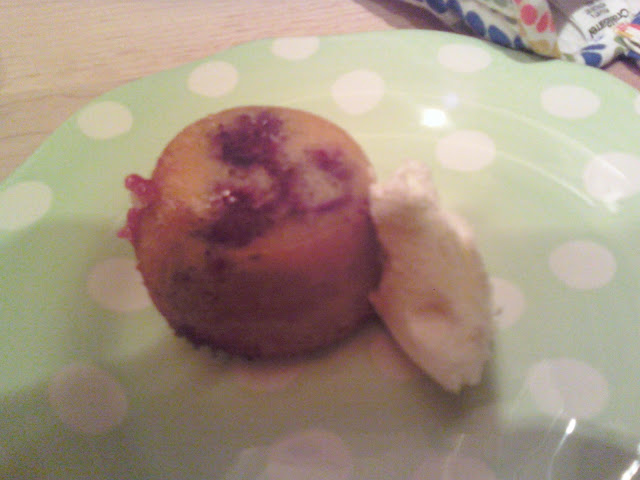
This Raspberry Cobbler recipe is a hybrid of cupcake and cobbler....and it is divine!

This is what you need (for 6 individual cobblers):
-1 cup of Self Rising Flour (you must use this....all purpose flour will not work!)
-1 cup of Sugar
-1 cup of Milk
-1 stick of Butter-melted
-1/2 tsp Vanilla
-1 cup of Raspberries (or any other berry you prefer)
-Extra Sugar for Sprinkling

Get your oven nice and ready by preheating it to 350 degrees. Then butter and flour your muffin pan and set aside.
*Note: I am in LOVE with "Pam Baking Spray". The spray contains flour and it works like magic. It's a miracle for baking. I dare you to use it.

In a large bowl, combine flour and sugar, then whisk in the milk. Continue whisking as you add in the melted butter and vanilla.
Then, pour in about 1/4 cup of batter into each muffin tin and place 3-4 raspberries on top of the batter. By the end of the baking process, the raspberries will have sunk to the bottom of the tin. Sprinkle about 1/8 to 1/4 tsp of sugar on top of the raspberries/batter.

Bake for 35-45 minutes until the cobblers become a nice crisp golden brown.
Flip them over using a cooling rack and some of the fruit/batter might stick to the pan, but we aren't about appearance, we are about incredible taste! "Who's to know!"
Eat them warm with whip cream or vanilla ice cream!
Isn't that just the cutest cobbler you have ever seen before?
Enjoy!

Thursday, August 12, 2010

Death By Cheese Dip

You better start writing out your Will because once you eat this, you will start feeling your arteries clog and cholesterol go up! But if you make this only once a year, it can't do that much harm! Right?
Dusty's mom introduced me to this recipe when we were visiting his parents house for Dusty's birthday. We spent the whole weekend watching football because Dusty's favorite teams were on TV and I swear the only thing that got me through countless hours of NFL football was this cheese dip!

This is who is invited to the party!
-1 package of PepperJack Velveeta
-1 cup Jalapeno Ranch Dressing or Regular Ranch Dressing (depending on your spice tolerance)
-1-1/2 cup Sour Cream
-1/2 Onion-minced
-8 oz. of Beer (because I'm naughty like that)

All you have to do is cut up the Velveeta into cubes so that you can melt it in a saucepan over Medium Heat.
Once the cheese is melted, add all the other ingredients to the saucepan, whisk it up good until fully incorporated and then heat it till it reaches a slight boil.
I got excited and had to try some....
Serve it with Tortilla Chips or Soft Pretzels. It's to die for!
Enjoy!

Huckleberry Crumb Cake with Huckleberry Sauce

Top 5 Reasons Why I Love Montana:

#5...No Traffic or Freeways
#4...Beautiful Weather
#3...Big Open Blue Sky's
#2...Gorgeous Mountains
#1...Huckleberries!!!!

At Farmer's Market last weekend I bought a pound of Huckleberries and I've been holding out for the perfect recipes to use on my precious berries and I found it!!!
Huckleberry Crumb Cake
I got the idea from Pioneer Woman when she made Blueberry Crumb Cake and I wanted to add my Montana twist to it by substituting Blueberries with Huckleberries.YUM!

This is what you need:
-1/2 stick of Butter + 1 Tbsp Butter
-3/4 cup Sugar
-1 Egg
-1/2 tsp Vanilla
-2 cups Flour
-2-1/4 tsp Baking Powder
-1/2 tsp Salt
-3/4 cup Milk
-2 cup Huckleberries

For the Topping:
-3/4 stick Butter
-1/2 cup Sugar
-1/2 tsp Cinnamon
-1/2 cup Flour
-1/4 tsp Salt

Get your oven ready by preheating it to 350 degrees and grease a 9 x 13 inch baking dish. In a bowl combine flour, baking powder, and salt. In a seperate bowl, cream 1/2 stick + 1 tbsp butter with sugar. Add egg and vanilla and mix. Add flour mixture and milk alternately and mix after each addition of ingredient. Gently stir in the Huckleberries and start getting excited!

Pour in the batter and start making the Topping...

In a new clean bowl, combine topping ingredients and cut together using a pastry cutter. Sprinkle over the top of the cake.
Bake the cake for 40 to 45 minutes when the cake starts turning a nice golden brown. After you pull it out of the oven sprinkle the top with sugar.

Now comes the fun part....Huckleberry Syrup!
-1 cup Huckleberries
-1/2 cup Sugar
-4 tbsp Water

Over Medium Heat boil the berries with the sugar and water until it becomes a nice thick wonderful syrup.

Use a strainer to get rid of the unwanted berry gunk.

That's it! Use it with pancakes, waffles or better yet....pour it over your Huckleberry Cake with some Whip Cream!
Enjoy!

*Note: I did not take any of the Montana scenery pictures (gotta love Google Images!)


Tuesday, August 10, 2010

Fiesta Eggs and Potatoes!

Throughout my life I have had issues with eggs. Major issues! If eggs weren't scrambled or cooked completely like an omelet, there was no way that those eggs would be passing through my lips. This summer I have been daring myself to reach outside of my comfort zone and try foods I wouldn't normally eat and this mornings challenge: Fried Over-Easy Egg. This had been my one true enemy in the culinary world. The thought of the runny yoke and egg whites just made me gaggy. Like I said before....I have issues.

But this morning was different, I had found a recipe on Pioneer Woman for Huevos Ree-os and Basic Breakfast Potatoes and it looked good, except for one thing....it required making an over-easy egg. So I sucked it up and made it, and you know what??? Fried Over-Easy Eggs are delicious!!!! It was so yummy and I really enjoyed it! It made me feel like a totally ninny for wasting all these years on scrambled eggs. Now my breakfast menu variety had doubled, if not tripled! Ask my mom, eating an over-easy egg is a big deal for me. She can back me up.

But anyways, you aren't here to read about my issues, you are here for the food!
This is what you need for Fiesta Eggs and Potatoes (for 2 people)....

Fiesta Potatoes:
-8 to 10 Petite Golden Potatoes or 4 Large Red Potatoes
-1/4 Onion-chopped
-1/4 Bell Pepper (Green or Red)-chopped
-1 tbsp Olive Oil
-1 tbsp Butter
-Salt and Pepper to taste
-1 tsp Alpine Touch or any other Seasoning Mix of your choice

First you need to boil the potatoes until they are fork tender and then cut them into 1 in. cubes.

Over Medium-Heat, drizzle 1 tbsp of Olive Oil in the pan and melt 1 tbsp of butter as well. Saute the chopped Onion and Bell Pepper until it turns golden brown.

Add the potatoes, stir them around a bit and then press and pack them.Sprinkle the salt, pepper and seasoning of your choice to taste.

Allow them to sit there and cook for a couple minutes (don't stir!) until the potatoes become slightly crispy and then stir them around again so that other sides of the potatoes can receive equal opportunities to become crispy too. Allow them to cook for a couple minutes more and then you are done! Fiesta Potatoes!

Fiesta Eggs:
-4 Eggs
-4 tbsp Salsa
-1/3 cup Shredded Colby Jack Cheese
-1 tbsp Butter

Over Medium-Low Heat, melt 1 tbsp of butter in your skillet. Once it is all melted you can crack open your eggs onto the skillet/pan and let the first side cook until it is "flippable." Once you flip over your eggs, place about 1 tbsp of Salsa on each egg and sprinkle the shredded Colby Jack Cheese on top of the salsa.

 Let the cheese melt and the egg cook to your desired yolk consistency and then your Fiesta Eggs are ready for you to eat!
Enjoy!

Monday, August 9, 2010

Savory Stir Fry

Growing up, soy sauce was not allowed in my families household because my mom is VERY allergic to soy beans. VERY, VERY ALLERGIC! Therefore, I never experienced the joy of soy sauce as an ingredient/sauce until I went to college and joined some friends for Sushi for the first time in my life Junior year.
Now it is a staple ingredient in my apartment! I love this stuff!

Tonight I discovered the best Chinese restaurant in Missoula: MY KITCHEN! I made this recipe from Pioneer Woman for Stir Fry and it was so savory and delicious. Yum! is all I can say about this Stir Fry!

This is what you need (for 2 people):
-1 chicken breast
-1/2 tsp Sesame Oil (plus more for drizzling over meat)
-1/4 cup Soy Sauce (plus more for drizzling over meat)
-1-1/2 tbsp Sugar
-1/4 cup Chicken Broth-divided (1/8 + 1/8 cup)
-1 tsp Corn Starch
-3 tbsp Oil (Canola or Peanut)
-1/2 medium Onion-chopped
-1/2 Green Bell Pepper-chopped
-Small jar of Baby Corn-cut into bite size pieces
-4 oz sliced Mushrooms
-1-1/2 tbsp Ginger-minced
-1 clove Garlic-minced
-1/2 tsp Rice Vinegar

IMPORTANT: Measure out and prepare all your ingredients before starting. This cooks fast and you have to be ready!

First cut the chicken breast into bite size pieces and then drizzle Soy Sauce and Sesame Oil over the chicken. Set it aside and let the chicken soak up the sauces.

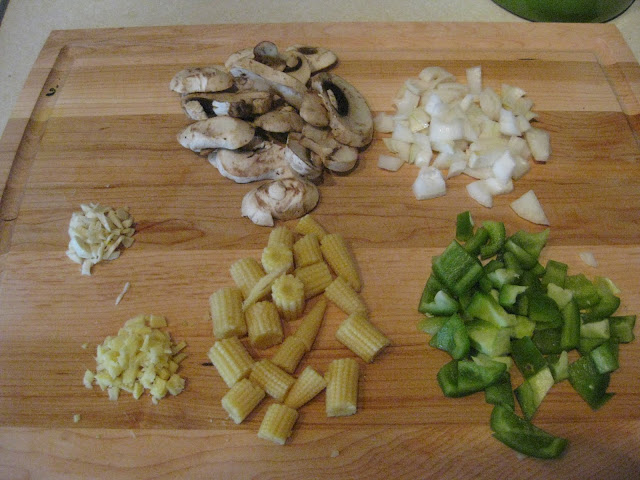
Chop up all the veggies and get them ready to go.

Mix 1/4 cup Soy Sauce with 1-1/2 tbsp Sugar and set aside. Mix 1/8 cup of Chicken Broth with 1 tsp of Corn Starch and set aside. Measure out an addition 1/8 cup of Chicken Broth and set it aside as well.

Next, heat your large skillet over high heat until it's really hot and ready to go. Add 2 tbsp of oil to the skillet and then add the chicken with all of its juices. Stir around the chicken for 2-3 minutes until it's just cooked through. (Salmonella = BAD!) Place the cooked chicken in a seperate bowl and set aside.

Then add another tablespoon of oil to the skillet, add the chopped onions and let them cook for 1 minute. Add the chopped Bell Pepper and let it cook for 30 seconds. Add the Garlic and Ginger and stir. Add the mushrooms and let them cook for 45 seconds. Then last but not least, add the Baby Corn and stir. Whew! That was intense!

Pour in 1/8 cup of just Chicken Broth and also pour in the Soy Sauce/Sugar mixture. Add the Rice Vinegar and Sesame oil as well and continue stirring.
Add the chicken back into the skillet (it was getting lonely and wanted to party with the veggies!) and then add the Cornstarch/Chicken Broth mixture. Stir everthing together and then turn off the heat. The sauce will get nice and thick...just how we like it!
Look how beautiful it is...you can even see the steam rising from the skillet of goodness!


Serve it over cooked rice and you are good to go!
Enjoy!

Zucchini Cakes

On Saturday I went to Farmer's Market with a mission: I was going to buy fresh produce and support the locals!

After watching the movie "Food Inc," you feel dirty for being in a grocery store and support the big corporations. I actually discovered at Farmer's Market that most produce is cheaper that in the stores. I was able to get 3 good size zucchini's for only $1 and 4 onions for $2! What a steal! Although, I blew my money on Huckleberries....those don't come cheap no matter where you go! $10 for 1 pound...OUCH! I bought a pound and I am holding out for the perfect recipe for my precious Huckleberries.

Now that I have 3 Zucchinis, what the heck am I going to make?
I'll tell you what I'm going to make...Zucchini Cakes!
These are so delicious and full of wonderful flavors.

This is what you need:
 -1 medium sized Zucchini-grated
-1 clove of Garlic-minced
-1/4 cup Seasoned Breadcrumbs
-1/4 cup Parmesan Cheese (shredded or grated-whatever tickles your fancy)
-1 Egg
-Salt and Pepper to taste
-Olive Oil

First wash the Zucchini, cut the ends off and grate them in your cheese grater. Then take the shredded zucchini and sqeeze as much water out of it as possible using a clean dish towel. It's important to get as much liquid out as possible so that the cakes cook more efficient.

Place the zucchini in a bowl and combine all the ingredients (except olive oil) and mix them together with a fork. Form the mixture into patties about the size of silver dollar  pancakes.

Over Medium Heat, heat up your pan and then add the olive oil. Let it sit for a minute so that it gets nice and hot too. Place 2-3 patties at a time in the pan and let them cook for 2 minutes on one side and then flip them over with a spatula and let them cook on the other side for 2 more minutes until both sides are a nice golden crispy brown.

That's it...4 minutes of cook time and then you have delicious zucchini cakes!
Enjoy!
P.S. If you have noticed that my pictures are about 100% better quality, it's because I stole Dusty's camera and I'm holding it hostage!
Related Posts Plugin for WordPress, Blogger...